A tenant reports water under the kitchen sink at 8:00 a.m. By noon, the cabinet base is swollen, flooring is lifting, and the tenant has moved boxes into the hallway. The repair matters, but so does the record of what happened before anyone removes damaged material. Knowing how to document water damage gives owners a clear file for insurance, tenant communication, repair decisions, and future accountability.
For rental owners and property managers, documentation is not paperwork for paperwork's sake. It shows when the issue was reported, what areas were affected, what immediate steps were taken, and why certain repairs were necessary. That record can prevent disputes over responsibility, support an insurance claim, and help you avoid paying twice for damage that was never fully identified.
Start with safety and stop the source
Do not start taking photos while water is actively reaching electrical outlets, ceiling fixtures, or a breaker panel. Keep residents out of unsafe areas and shut off the water supply if you can do so safely. A leaking supply line, failed water heater, overflowing toilet, roof intrusion, or HVAC condensate issue can keep causing damage while everyone is focused on the evidence.
Make a quick note of the date, time, person reporting the issue, and the apparent source. If the source is not clear, write that down rather than guessing. "Water visible below upstairs bathroom, source not yet confirmed" is more useful and more accurate than assuming a pipe has failed.
If sewage, floodwater, or other contaminated water is involved, limit access. Cleanup requirements can be different from a clean supply-line leak, and removing materials too quickly may make it harder to document the extent of contamination.
How to document water damage with photos and video
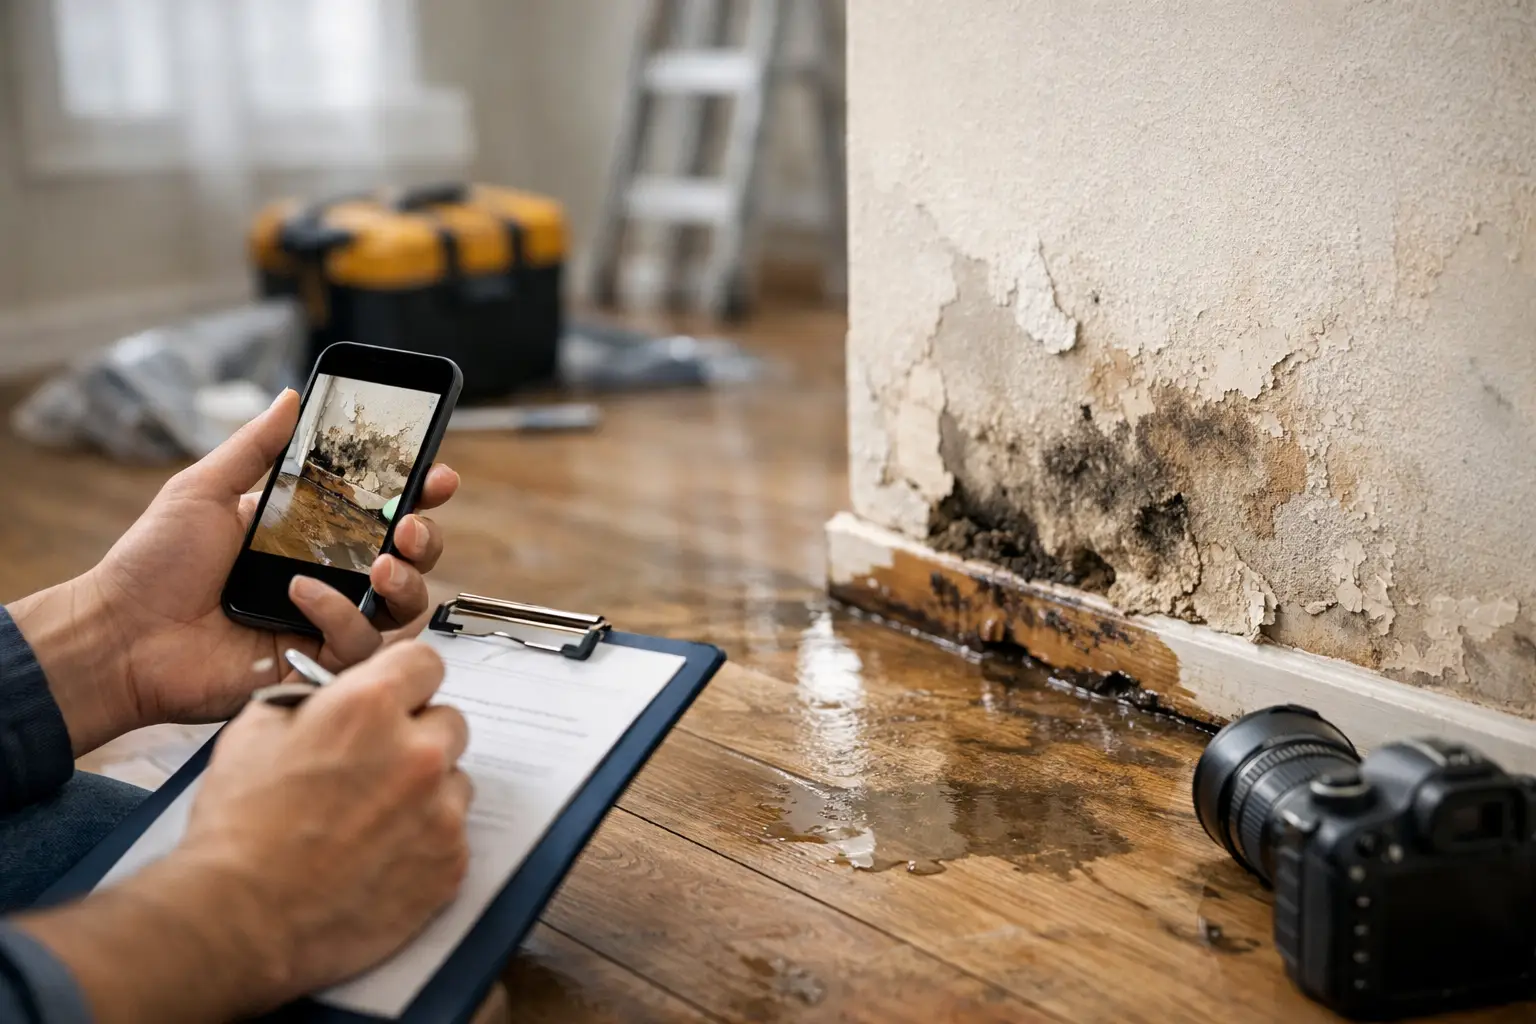
Photos are the core of a usable water-damage file. Take them before cleanup, demolition, drying equipment placement, or repairs change the scene. Use a phone if that is what is available, but take purposeful photos rather than a few random close-ups.
Start wide. Photograph the exterior of the property if a roof leak, storm entry point, broken hose bib, or drainage issue may be involved. Inside, capture each affected room from multiple corners. Wide images establish where the damage occurred and show the relationship between the water source, walls, flooring, cabinets, furniture, and nearby rooms.
Then move closer. Photograph water stains, wet drywall, buckled flooring, damaged baseboards, swollen cabinetry, ceiling sagging, peeling paint, wet insulation, and affected belongings. Include the suspected source when visible, such as a split supply line, leaking valve, overflowing appliance pan, or failed washing machine hose.
Take a short video walk-through as well. State the date, unit or property address, room, and what you are seeing. Move slowly enough for the footage to be useful. Video is especially helpful when water has traveled across several areas or when a ceiling, wall, or floor feels soft but the damage is hard to show in a single image.
Avoid editing images, applying filters, or marking them up before saving the originals. Keep the original files in a dedicated folder and back them up. If the photos are later needed for a claim or dispute, original timestamps and full-resolution images carry more weight than screenshots passed around in text messages.
Record the details photos cannot show
A photo can show a stain. It cannot reliably show when the stain was discovered, whether it was actively wet, or what steps were taken to prevent further damage. Pair your images with a written incident log.
Your log should identify the property address, unit number, date and time of discovery, date and time the tenant reported the problem, and who inspected it. Describe the water source if known, the rooms affected, and the visible damage. Be specific: "Water pooled approximately six feet from dishwasher into dining area" is better than "kitchen flooded."
Also record the condition of the property at the time of inspection. Note whether water was still flowing, whether the water supply was shut off, whether power was turned off in any area, and whether the resident moved personal property. If the property is vacant, document that too. A vacant unit can remain wet longer before anyone notices a problem, which affects the repair scope.
For landlord-tenant situations, save the original maintenance request, voicemail, email, or text message that reported the issue. Keep communication factual and time-stamped. Do not use the file to assign blame before the source and circumstances are known.
Capture moisture readings and hidden damage
Visible water is often only part of the job. In Florida properties, humidity can slow drying and allow moisture behind walls, under flooring, or inside cabinets to become a larger problem. If a qualified maintenance or restoration professional uses a moisture meter, thermal camera, or hygrometer, include those readings in the file.
Moisture readings should list the material tested, the location, date, and result. For example, a reading on the lower drywall beside a bathroom shower is more useful when it is identified by room and wall location. The same applies to flooring, subflooring, cabinetry, and ceiling materials.
Not every small leak needs a full restoration protocol. A minor drip caught immediately may require a plumbing repair and limited drying. But water that has soaked drywall, traveled under vinyl plank flooring, entered an enclosed wall, or sat unnoticed for days deserves a closer assessment. The trade-off is simple: opening materials unnecessarily adds cost, but failing to identify trapped moisture can lead to repeat repairs, odors, and avoidable mold growth.
Keep damaged items until they are documented
It is natural to want a damaged cabinet, rug, insulation section, or piece of flooring out of the building immediately. Before disposal, photograph the item, note its location, and record why it was removed. If practical and safe, keep samples or damaged components until the insurer or responsible party has had a reasonable chance to inspect them.
This does not mean leaving soaked materials in place while they deteriorate. Property owners have a duty to take reasonable steps to limit further damage. The goal is to document first, protect the property next, and preserve evidence when doing so does not create a health or safety problem.
For personal property or unit contents, create a basic inventory. Include the item, approximate age, condition before the loss if known, and whether it belongs to the owner, tenant, or business. Receipts, serial numbers, model numbers, and prior photos can help establish value, especially for appliances, electronics, and furnished rental inventory.
Save invoices, reports, and repair decisions
The water-damage record should continue after the initial emergency. Save invoices for plumbing diagnosis, water extraction, drying equipment, demolition, material replacement, cleaning, and temporary accommodations if applicable. Keep contractor reports that explain the cause of loss and recommended repairs.
If repairs are staged, document each stage. For example, the file may show that a plumber stopped the leak on day one, affected drywall was opened on day two, moisture readings improved over the next several days, and repairs began only after materials reached an acceptable dry condition. This timeline shows that the property was handled responsibly instead of being patched over too soon.
Owners should also photograph completed repairs. Take before-and-after images of repaired walls, replaced flooring, cabinetry, paint, plumbing connections, or roof penetrations. For rental properties, this creates a clean record for the next inspection and demonstrates that the unit was returned to a safe, functional condition.
Organize one file for each incident
Scattered texts, photos on several phones, and invoices buried in email create unnecessary problems. Set up one digital folder for each water event and use a consistent name, such as the property address followed by the incident date. Place photos, videos, incident notes, tenant communications, moisture records, estimates, invoices, and completion photos in that folder.
A simple timeline document can tie it all together. List the report time, inspection time, source-control action, vendor arrival, drying steps, and repair completion date. This is particularly valuable for owners with multiple units, HOA boards, and commercial properties where several people may need clear updates without chasing contractors for answers.
R&M Services documents maintenance work with photos and clear reporting so Marion County property owners can see what was found, what was done, and what still needs attention. That kind of record keeps emergency decisions moving while protecting the long-term condition of the asset.
When water shows up where it should not, speed matters. Take clear evidence before the scene changes, stop the source, protect occupants, and keep every repair decision connected to the file. A well-documented water event turns a stressful call into a manageable repair process - and gives you a far better starting point if questions come later.